Showing posts with label apartment living. Show all posts

Saturday, September 27, 2014

Follow Up - What to Do About That Boring Bathroom?

Remember way back when, when I was complaining about our boring apartment? Well, more than half a year later, we're finally making some progress.

Now, we've being adding little things around the apartment to spruce things up. Like our night-stands, which added some much needed space in our bedroom. We finished our kitchen table, and can now eat breakfast like grown-ups (instead of sitting on the couch to do so). And we've been putting various art-works up around the apartment. But today, we took a big step toward de-borifying our apartment. We hung a shelf in the bathroom!

Okay, now I know that doesn't sound like much, but it made a big difference and really pulled the space together. Let's take a look at some before and after pictures, shall we?


Here's the Before picture. We've got a toilet, a trash-can, and uh, that's about it. Boring right? I mean, it's not like a bathroom needs a lot of stuff in it to be functional, but it's not exactly pretty like this. What to do? Decorate! And here's what I did:

I hate that stupid sliding door that you can see in the right of the picture. It really doesn't slide well, and we just always keep it shut. So I added some posters that I found in an old anatomy book.

Somehow, these seemed appropriate for the bathroom

These have been up for several months, and have added a lot of fun to the bathroom. We get a lot of compliments on them from guests.

A month ago, there was a lot of flooding in South-East Michigan. The sewer system in the Metro-Detroit area got overwhelmed one day when we had a lot of rain, and many many basements flooded. Why am I telling you this? Because my in-law's had a flood in their basement and ended up having to throw out a book-case that had water damaged (and mold growing on it). Why am I telling you this? Because the shelves inside the book-case were perfectly fine, and we snagged two of them!

A little warped, but they work fine
We decided to hang the shelves in the bathroom, so we went out and bought a bunch of really pretty shelf-brackets to hang them with.

We went to 2 different hardware stores to find brackets this pretty!

And then we went ahead and got to hanging our shelf! We have two of these shelves, and we were originally planning on hanging both of them in the bathroom, one on top of the other. But after we hung the first shelf, we just liked the way it looked, and decided to just go with the one.
Once it was hung, the only thing left to do was to decorate, so we did.

I've got a carefully curated collection of books, my crocheted uterus and a Rubik's Cube. Of course.We finished everything off with a gorgeous framed picture that we got last year as a wedding present.

I need to get a copy of Mary Roach's Gulp to finish out my bathroom collection.

So there you have it. We finally fixed up our boring bathroom, and you know what? It's not so boring any more. Here's the official After picture, check it out:

Scroll back to the top to compare the Before picture

So what do you think? Do you like our choice of decor? I know it's not everyone's style, but we like it. I feel like we're slowly making our apartment into a home. Our kitchen is almost done, and we're working on the bedroom. Next up is the den (still the worst area in the house), and the living room/TV area. Sigh. There's always so much more to do. Back to Pinterest!


That's it for today. Stay tuned for next time when we'll... Well, I don't actually know. But I'm sure it'll be something interesting. Like when we went grape-squishing. That was interesting wasn't it? Oh wait, I didn't write about that yet! Stay tuned next time for when we go grape-squishing!

Wednesday, September 17, 2014

We (finally) Made a Table!

So, remember waaaay back in April, when I said that we were going to be making ourselves a kitchen table? Well, we finally finished it! And yes, it's really taken us 5 months to finish it... But you don't want to hear a lot of excuses about how we're both super busy (two jobs, blah blah blah, grad-school, blah blah blah), or how we don't have our own space to do wood-working, or anything like that. You guys just want to see pictures, am I right? So, let's get to it.

We made Ana White's Sewing Table to be used as a kitchen table in our tiny apartment kitchen. We thought it would be perfect because the table has two leaves that can be folded down (if we need more floor space), or popped open to eat at (if we need more surface area). Considering we have a fairly small kitchen, I figured this would be the perfect multi-use table. And I was right.


 Here you can see the table open and shut. See how much space I have/save?


 The whole project started with one full-sheet of plywood that we had cut down at the lumber yard.

Yes, I know our plywood isn't the best quality. I'm okay with that.

We then cut it down further to make the pieces that would make up the center frame of the table. Once those pieces were cut, we assembled them.

This is half of the middle of the table...
And that's where we ran into some problems. Things didn't quite... come together the right way. I blame our crappy table-saw. We measured carefully and sanded well, but we were off a bit, and nothing was quite square when we put it all together. Grr. No worries though, we fixed it up with our super-sophisticated clamping system.

A come-along and 2 50lbs bags of flour.

Once we had everything squared away (ha, see what I did there?), it was time to paint. We had gone back and forth on the paint color a few times, but finally settled on a deep, rich, TARDIS-like blue that made us both happy.


For the painting, we were able to bring our table home and paint out-side on our balcony, so things progressed a little more quickly. Once all of the pieces were painted, we attached the leaves with cheap hinges we picked up at the local big-box hardware store.

I have to admit that it did take us about a month between assembling and painting the table until we got around to making the legs. I don't know why, because this turned out to be the simplest step in the whole process, but we took our time getting to it.
Once we finally did make the legs though, we just attached them to the leaves with more cheap hinges and we were pretty much done.

Oh, except for attaching castors to the bottom of the table so that it can easily be rolled around our kitchen (we've got linoleum).

At that point, all that was left to do was to put some of our bowls and cook-books into the storage compartments, and have breakfast!

Okay, that might have been dinner, but you know what I mean.

I love my kitchen table! It's got storage, so I can keep all of my cook-books right in the kitchen, and I can also store some of my smaller kitchen appliances that I don't use very often (like the ice-cream maker and the crock-pot), so that they don't take up much needed counter space.
I also love that it's blue, which is my favorite color.
And most of all, I love that we made it ourselves! And it was easy.

If I could start the whole project again, would I do anything differently?
    Yes, I would invest in a better quality plywood. We picked up a sheet of construction plywood for $25. With a lot of sanding and a coat of paint, it looks beautiful. But for $25 more, I would get Oak or Maple plywood next time and save myself a lot of sanding.


So that's it, our much awaited kitchen-table (at least, I've been waiting for it for a long time). What's next, you ask? That's a good question, I say. I don't know what's next. Right now we're shopping for some nice kitchen chairs, but I don't think we're going to make them.
I'm not sure what our next wood-working project will be, but I'm open to suggestions. Leave your ideas in the comments, and let me know what you think we should make!

Wednesday, July 9, 2014

The Hornet Saga

Gather 'round children, and let me tell you a story. This is the story of the hornets that decided to make their home on our balcony, and the leasing office that wanted nothing to do with them.

Our story begins last Wednesday (July 2nd) when I was out on our balcony watering our container garden. I noticed a large swarm of (rather large) insects near the corner of the over-hang, and remarked on it to my mother, who was on the phone with me at the time.
She suggested that I call an exterminator. I shrugged it off. "Meh," I said. "There are some bugs, no big deal."
I changed  my mind fairly quickly when said insects began attacking me. I was hit a few times in the head and shoulders by dive-bombing maniacs, and I fled indoors. I took a look at the corner of the balcony from the vantage point of our window... And saw this:


I called the leasing office as soon as I got off the phone with my mother. I explained that there was an alarmingly large nest on the outside of our balcony. I was told that the exterminators were actually in the complex, and there was a good chance that someone would come out that day to take care of the nest.
I gave the office detailed directions to pass along to the exterminator, explaining clearly that the nest could not be seen from the balcony, and that if the exterminator would look at the roof from the window I indicated, he would be able to see the nest no problem.

My husband and I went out that night, to see a fire-works show, and by the time we came back it was late, and dark, and we were tired. But we saw that a service note had been left for us. The service note had a box checked off on it... The box read "treated". It was dark, and we couldn't see the nest, but we were happy to know that the bug problem was over.

We were not so happy the next morning, when we woke up to see that the nest was still there, and that there were bugs till flying in and out. I called the leasing office again before I had to leave for work. I was told that the exterminator had been there the evening before, and that he sprayed. When I asked why there were still bugs flying around, the lady at the leasing office said:
"I don't know, that's not my profession."
When I asked her if she could find out for me, I was told that it can take 24 to 48 hours for the bugs to all die, and that it was all perfectly normal. I asked if I could call again in a few days if the bugs were still there, and I was answered very dismissively.

That was Thursday (7-3), and we had a very busy weekend. We didn't get home until Saturday night, when we noticed that the nest was still there. Sunday morning there were more bugs swarming around, and by Monday morning (7-7), when I called the leasing office again, the nest looked like this:


Bigger and badder. Yuck. I called the leasing office and was initially given the run-around. Finally, I was told that they would call an exterminator. I was frustrated and expressed this by explaining that we had been dealing with this issue since Wednesday. The lady at the leasing office said:
"Okay, we'll order and exterminator for Wednesday." And then hung up on me.
Great, annoying, but at least we'd be getting this taken care of.

This time, I was home for the exterminator, and it was a lucky thing. I took him over to the window, and showed him exactly where the nest was. What was the first thing he said?
"Good thing you were here, I never would have spotted that."
He confirmed my suspicions that the nest had never been sprayed to begin with, and gave me a name for our intruders.

Bald-Faced Hornets, nasty little things, and nothing to mess around with, according to the exterminator. I asked him why the nest hadn't been sprayed last week, when I first called. He said that the guy probably walked out onto the balcony, didn't see the nest, sprayed a bit and went home. I explained that I left detailed instructions with the leasing office. But apparently, the leasing office didn't pass along any of those instructions.

TL;DR?

  • We had a hornet problem.
  • I called the leasing office - they promised to take care of it.
  • When the hornets persisted in being alive, I called them again
  • They continued to be dismissive with me - telling me it wasn't a problem
  • When the hornets were still there almost a week later, I called again
  • This time, they were rude, but did call an exterminator
  • He came and informed me that the nest had never been sprayed
  • This time, he sprayed and killed the hornets
How do I know. Because this time, the nest looks like this:


See all those gross yellow things? Those are eggs, ready to hatch into more hornets, like ~50 more of them! I'm so glad that I was able to get this hornet thing taken care of, but super annoyed that it took a week to do it!
I explained to the leasing office how they needed to handle this, and they were rude and dismissive, and as a result, I couldn't enjoy my balcony or take care of my plants the way I wanted to for the past week. I almost wouldn't mind so much, if we weren't paying quite so much for rent...

What's the moral of this story, dear readers? The moral is that this is not how you treat your leasers. The moral is that if you want people to continue renting you need to treat them with more respect, and respond more promptly to service calls. You need to take care of maintenance issues, rather than telling your renters to take care of it themselves.

For now, I'm upset yes, but I'm also relieved that this hornet problem is over and done with, and we'll just have to wait and see what the next issue will be...

Wednesday, April 2, 2014

Oh Yeah, We Built Night-Stands!

So, remember that SUPER SECRECT project I've been babbling on about for ages now? Well, it's done! They're all done! What are they you ask? Why, night-stands, of course!

 
This one's mine :)

Now, I don't have a picture of it (I should, really) but up until now I've been using an empty box as a night-stand, and I cannot tell you how many times I've knocked the damn thing over trying to turn my alarm off and had all of my things go flying. Grr. Very frustrating.
So  way back in December my husband and I decided to rectify this grievous error by making ourselves a pair of matching custom night-stands. Easy, right?

Well it was actually pretty darned easy, just a bit time consuming, but I'll get to that later. In the mean time, let me should you how we made that gorgeous night-stand from this pile of wood:


Now we absolutely have to give credit where credit is due. The original plans for this night-stand come from the amazing and talented Ana White. The night-stands are adapted from her Narrow Cottage End Table plans. But wait, there's more credit to be distributed.

When I first had the idea to build our own night-stands, I immediately consulted with my personal friend, Google. And he recommended a blog called Attempts At Domestication, where they were hard at working building their own night-stands. They had already done the hard work of adjusting Ana's plans to fit a night-stand instead of an end-table, and as you can see we borrowed extensively from their design. (We adjusted the height and such, but really... we're thieves, plain and simple). We also took to heart their suggestion of investing in a pocket jig and well, we couldn't have made this project without it, so thanks!

Okay, now back to our project. We had a pile of wood all cut and ready to go... so what to do net? Assembly, of course! We busted out or brand new Kreg Pocket-Hole Jig (at ~ $40, easily the most expensive part of the project, but totally worth it), and got to work!

First up, we put together the pieces that would become the sides of the night-stands. As you might be able to tell from this picture, we opted to make both night-stands at once. This is because we both needed night-stands, and because we're very lazy people. I knew that if we didn't make both at once, that second stand would never get finished.


Ta-Da, sides are assembled!
Next up was to put the entire "base" of the stands together. This includes the sides & back, and the drawers.

 
This involved a lot of clamping, and much use of our (by now) beloved Kreg Jig. It wasn't super easy and seemed to take a lot longer than it actually did, but we eventually got the base of the night-stands fully assembled.


We opted not to go the drawer-slide route, and instead just tacked a piece of scrap plywood onto the bottom of the stand to serve as a drawer runner. It actually worked pretty well (after a coat or two of some candle-wax) and was certainly easier. Considering how small our drawers are, and the fact that so far I've just got my kindle and my glassed in mine, I'm pretty happy with that decision.

The next step (that we actually did first, shhh!) was to put together the tops. Again, our Kreg Jig was invaluable here. It allowed us to assemble boards flush to one another without any screws or nails showing at all.

Look Ma, no screws! Well, none that you can see at least.
I realize that for some reason, I don't have a single picture of us assembling the drawers themselves. Weird, because I'm usually fairly obsessive about documenting every step, but what can you do. I promise you that we did in fact build drawers. Here, you can see them in this picture:

 
There's everything drying off in our storage space after receiving a first coat of paint/stain.
Now I should mention that one of the reasons that this project took us ~3 months to finish is the fact that we don't have a good work space in our apartment. My husband has a nice "shop" area, but it's at his parent's house. Which meant schlepping over there whenever we wanted to work on these. Add in my husband's full time job, my two part-time jobs and the fact that we had a VERY cold and snowy couple of months, and well... you can see how things just took a bit longer than we were expecting.
So when it was finally time to paint and stain, we jumped at the chance to take our night-stands home and work on them (we've got a small balcony and a drop-cloth, perfect for this task).


Our beautiful stained night-stands :)

The whole project took a bit longer than we wanted, but the cost came in at about ~$75, and that's for both night-stands. I actually have a break-down of how much we spent on each block of wood, but I don't want to bore you more than I already have. The Kreg Jig was ~ $40 and worth every penny. And I didn't document this very well, but I think that we spent about $20 on paint, stain and polyurethane. All in all, a pretty cheap project, and certainly a lot cheaper than buying night-stands at a place like Art Van (where we got our amazing, but very expensive bed).

So that's about it, our night-stands. We're thrilled to have them, and we both had so much fun making them that we're already onto the next project! I won't keep you guys in the dark this time though, I'll go ahead and tell you that we're using another Ana White design to make a kitchen table for ourselves, since we uh, still don't have one. So stay tuned for that!


Painted, stained and assembled with matching drawer-knobs.
And don't they look beautiful with our anniversary art hanging over them?


So what have you guys been working on lately? Any cool DIY projects? I'd love to hear all about them in the comments!


And P.S. Go check out www.ana-white.com and www.attemptsatdomestication.com both amazing blogs, very inspiring and well worth the read!


Sunday, March 23, 2014

Projet Sunday 3-23-14

It's that time again folks! Time to re-cap yet another amazing Project Sunday! And it's been a pretty productive one, if I do say so myself!

We slept in a bit, as one is wont to do on a Sunday morning, but immediately sprung into the spring-cleaning spirit. I had decided that I was going to tackle a few problematic areas of the apartment today, so while my husband worked on cleaning our snake's cage (which badly needed doing) I vacuumed the bedroom, bathroom and kitchen.

Then we got to visit with a friend who just got back from France, and do some grocery shopping with them. Yes, this is what we do for fun. We needed to go, they needed to go, it seemed like a good idea. And... check out what they brought back from France for us (okay, mostly for me):

It's from a French medical text-book, can you tell?


Isn't that sooooo cool? I'm going to have it framed and you know I'll share some photos of the finished product!

Next on the agenda we had to decide if we were going to stay home to work on the NAME OF PROJECT REDACTED FOR SECURITY REASONS, or wander down to the university where my husband works to help the Steel Bridge team that my husband was captain of for 2 years running (and since competition is next week, they badly need all the help they can get). In the end we decided to stay home and work on the TOP-SECRET project, and I'm so glad we did because some other friends stopped by and we had an amazing visit! :o) I love getting to see our friends, especially ones who live far away, whom we don't get to see often enough.

After that, I ran off to do some actual work (super fun, I know) and gave my husband time to just relax. When I got home we got to finally put the almost finishing touches on the PROJECT THAT SHALL NOT BE NAMED. So that's a good thing. We're like, 98% done at this point, and I swear that I'll have a really big post all about it when we're done.

Whew, I guess that's about it for this Project Sunday, but that's a lot right? We worked our little buns off, but had a really lovely and amazing day, full of projects and friends. What more could we possibly ask for? Spring temperatures above freezing? Nah. Who would want that?


Hey, how did you guys celebrate Project Sunday? Working on anything interesting or fun? Tell me about it in the comments!

Tuesday, March 11, 2014

Anniversary Art

I've mentioned my obsession with Pinterest, right? If I haven't, I guess I just did, and here's a re-cap: I'm obsessed with Pinterest! I'll admit, it took me the longest time to get into, but I'm so glad I did. Because I'm finding so many amazing things.

I've got different "boards" for each room in our apartment, filled with decorating ideas. I've already done a few projects that I found on Pinterest, and I plan on making a lot more, but I wanted to take a few minutes to share one that I'm particularly proud of.

It all started with this pin:

http://www.nalleshouse.com/2013/03/modern-art-for-living-room-part-2.html
 
I don't remember where I found it, but it's from a blog called: Nalle's House. As soon as I saw it I knew that I wanted to try to make one for myself! I pinned the picture to the "Bedroom" board and saved it for later.
 
Fast-forward a month or so. My husband and I were heading out this past Project Sunday to work on that super-secret project that I keep dropping hints about, and we were going to be passing by Michael's. Suddenly I remembered this project idea, and decided that we should pop in to pick up canvas and such. We picked up a two pack of canvas fairly quickly, but the stencils took a bit longer.
 
We browsed for a bit, and finally found a Martha Stewart brand stencil set that was kind of what I had had in mind. The pack came with a complete set of letters and numbers, was in a font that I kind of liked, and was several sizes smaller than what I was looking for... and yeah, for over $17, it just wasn't worth it. 
So I was at a bit of a loss for what to do stencil-wise, when my brilliant husband suggested that I make my own stencils. What an idea! With a bit of poking around in my word processing program, I could pick out any font I liked, and make stencils of almost any size! I picked up a pack of white construction paper for $1.99 (I figured it would make for a sturdier stencil than just printer paper), and we were off!
 
I didn't have a chance to work on my project then, even though it was Project Sunday, because we had other plans, but an evening shift on Monday left me almost the whole day for crafting!
 
I started by printing out the "stencils" I had designed the night before.


Then came the most annoying part, cutting out the stencils. I could have gone about this one of two ways. I could have cut around the numbers (which would have been so much easier), but past experience has taught me that I'm very bad at tracing around things. So, I took the much more tedious route and cut out the numbers. It was obnoxious, but I got it done with only a minimal amount of swearing.
 
Next up was tracing the stencils, and this part actually went pretty quickly, once I found a pencil:
 
It's a little hard to see, but I've outlined the numbers that I'm going to paint
 
 
After that, all I had to do was to color (or paint) in the lines! Now, I'm really not the best painter, so I thought that this was going to be the hardest part. But once I got started, it was pretty damn easy. I just had to have a modicum of patience and a very small brush.
 
Oh right, I forgot to tell you. I decided to make two paintings! Since we got a 2 pack of canvas for such a reasonable price (~$10), I thought, why not? The first painting has the date that we met, and the second one has our wedding date on it. It seemed appropriate, and super cute.
 
And you know what? They came out pretty damn awesome, if I do say so myself.
 
I know it's blurry...
 
Definitely not a Pinterest Fail. And now I'm thinking about making some more of them! They would make great wedding/anniversary gifts, and I've got a few of those coming up.
 
So, uh, that's all for now. Hopefully this mystery project I've been talking about will be finished really soon, because I'm dying to blog about it.
 
Stay tuned!


PS. I promise I'll post a better picture of the finished product as soon as we hang them and get our bedroom just a little more put together!

Monday, February 3, 2014

KILBY Bookcase Hack

So recently, my husband and I took our very first trip to IKEA. Well, actually my husband had been there a few times before, but it was all new and very overwhelming to me.

We were at the store in search of a couch, which we acquired (more on that soon, I promise), but we also needed some bookshelves. I don't know if they were featured in any of my boring apartment pictures, but I've got boxes and boxes of books just laying around the apartment with no where to put them.

Problem? 
Even though we've been here for over 6 months, the boxes everywhere make it look like we just moved in.

Solution? 
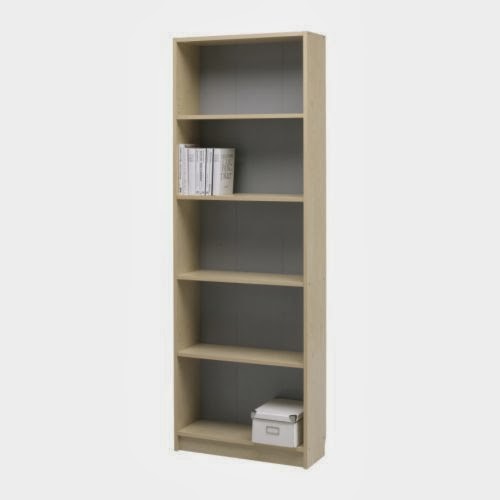
More bookshelves. Specifically, the KILBY bookcase that we found for a steal ($25) at IKEA. 

The new problem? 
It's kind of well, ugly as all get out. See for yourselves:


http://www.ikea.com/us/en/catalog/products/40068154/
The KILBY bookcase from IKEA

What in the name of interior decorating is with that ugly grey backing? It seems to be the only difference between the KILBY and the much more expensive BILLY is that ug-o grey back.

New solution? 
No problem, we'll hack it and make it pretty.

Enter two cans of Krylon Island Splash spray-paint. Only my husband and I are crazy enough to be spray painting outside when it's 20 degrees. We had one of those plastic table-cloth covers and we laid it over the back of our balcony so that we could spray away without worrying about making a mess in our rented space.


It took several coats of paint (we had to run out mid-project to get the second can of paint), and was frustratingly uneven for most of the job. It's been a long time since I spray painted anything, and for some reason I completly forgot how difficult it can be to get everything to come out smooth and even (even if you're using a glossy finish paint). But in the end, everything turned out even better than I had expected.

Check it out:

I call it the KILBY SPLASH

I love our IKEA hack! It adds such a wonderful splash of color to our drab apartment! 


So what's next? We're supposed to be getting a couch and well... stay tuned!


So what do you guys think? Would you "hack" a bookcase like this? Have you? What's your favorite hack? Let us know in the comments!

Thursday, January 23, 2014

DIY Spoon Rest

Now, I know that I've mentioned that I'm staring to get into Pinterest. I've made inspiration 'boards' for every room in our house.

One of the things I 'pinned' to the Kitchen board was this cute little spoon rest:

http://leisejones.com/2012/01/18/spoonrest/
How cute is that?
I pinned it because we desperately need a spoon rest in the kitchen. We do a lot of cooking on the stove, and we just end up getting pasta sauce and such all over the stove-top. :o( I've been looking for a nice spoon rest for a while, but most of the ones I've seen on etsy and such are $20! 20 bucks for a spoon-rest? Are you kidding me? So I figured I'd try my hand at making one. And it was just as easy as I thought it would be! Wanna know how I did it?

Step 1.
Acquire some supplies.


Step 2.
Start Painting:


Step 3.
Cut & Paste:


Then just hit everything up with a few coats of glossy Mod Podge and you're good to go!


I think it actually looks just as nice as the one in the picture! And how often can you say that about a DIY project? So there you have it, my very first Pinterest Project! :o)

Stay tuned for more DIY!


Tuesday, January 21, 2014

What to do about that boring apartment?

I think I mentioned that my husband and I are working on an awesome DIY project for our bedroom. I don't want to spoil the surprise by telling you what it is now, but don't worry, I'll post about it some time soon!

But in the mean time, I've been inspired to take a look at some of the other areas in our apartment that could use that good old DIY touch. To put it simply, our apartment is uh... boring. Yeah, boring. Some areas are even super-boring.

So I've been on Pinterest all morning, pinning like crazy. That's the right verb here right? Pinning? And I'm starting to collect some inspiration for things that I want to change in the apartment.

This is meant to be a pretty short post, but I wanted to share some of the "before" (which implies an "after", I hope) pictures of the problem areas in the apartment.

Boring empty bathroom


Our den, can you see the problem?


Another chunk of den... boring


Family room... desperately in need of a DVD rack

And finally, our kitchen. Yeah...


And now you can see why I'm so desperate to spice things up. The kitchen is particularly bad, mostly due to our lack of a kitchen table. :o( Needs to be fixed. And soon. It's actually our next project after the current top-secret DIYing.

So that's it, stay tuned for updates as they happen!

Tuesday, January 7, 2014

What to do about those drafty windows... (part 1)

I don't know if I've mentioned this before, but my husband and I live in an apartment. Now, my husband is just about the most handy guy I know. I literally believe that he can fix anything, but he is not used to living in an apartment. He's used to having a house, where if sometime breaks you just fix it.

So when we noticed that every single window in the apartment was drafty what was my husband's first thought?
Oh, I'll just caulk and re install the molding. No big deal.

Um, yes big deal. I really don't think that the leasing office will be thrilled with you taking apart their windows, even if you will fix them.

So we did what normal people do, and we contacted the leasing office to see if we could have their maintenance people come and take a look at it. This is what they said:

"With the draft in your windows we refer you to go to lowes because they have an actual window insulation kit there that is super easy to put up."

Uh.. what? Really, we have to do it ourselves? Can't you at least send someone out to take a look? Nope, apparently not. Thanks.

So what did we do? Well, we went to Lowe's. There's one right next to the apartment complex and like I said, my husband knows his way around a power tool or two. We went and picked up some foam insulation and we installed it in the windows. We picked up one roll and were able to take care of most of the windows in the apartment.

during all of this, we were also dealing with a thermostat issue (that didn't get solved, but got dealt with), so between those two big changes we made, we were really hoping to see some improvements in our heat situation. I mean, we had a window problem, the management told us to get a foam insulation kit at Lowe's & fix the problem ourselves. We did everything they told us to do, so that should have fixed the problem... right?

Wrong:
Can you see the ICE? I can...
This is the picture that we took after we had already added the foam insulation... Ugh. We contacted the management again to see if they would send someone out to take a look at the problem. Because to me, frost/ice on the inside of the windows kind of seems like a problem.

This time the management did send someone (we had another un-related issue that needed to be looked at as well). I wish I had kept the work-order sheet or at least taken a picture, because the adive was priceless.

Put plastic up!

Thanks... thanks a lot.


Stay tuned, there's more to come.